Authentic Cabbage Pierogi Recipe: A Beloved Polish Tradition
There's a special kind of magic in a homemade meal, especially one steeped in tradition and family history. Among the most cherished dishes in Polish cuisine are pierogi, those delightful dumplings filled with an array of savory or sweet ingredients. While potato and cheese often steal the spotlight, the humble yet incredibly flavorful pierogies with cabbage hold a unique and revered place at the table. This isn't just food; it's a taste of heritage, a comforting embrace from generations past, often lovingly passed down as "Babcia's recipe."
Making pierogies from scratch might seem like a labor of love, and it is – but every step, from kneading the supple dough to sautéing the savory cabbage, builds towards an unbelievably satisfying reward. This comprehensive guide will walk you through crafting authentic cabbage pierogies, transforming simple ingredients into a truly unforgettable experience. Prepare to impress your family and friends with a dish that perfectly balances tender homemade dough with a rich, savory filling, culminating in a meal that brings warmth and joy to any gathering.
The Heart of the Matter: Crafting the Authentic Pierogi Dough
The foundation of any great pierogi is its dough. A truly authentic pierogi dough is simple, yet requires a gentle touch to achieve that desired tender, pliable consistency that perfectly cradles the filling. Forget tough, rubbery wrappers; our goal is a dough that's delicate yet sturdy enough to withstand boiling and subsequent pan-frying.
Ingredients for the Dough:
- 3 cups all-purpose flour, plus more for dusting
- 1 large egg
- 1 teaspoon salt
- 1 cup warm water (or milk, for a richer dough)
- 1 tablespoon vegetable oil or melted butter (optional, adds elasticity)
Dough Preparation Steps:
- Combine Dry Ingredients: In a large mixing bowl, whisk together the flour and salt. Create a well in the center.
- Add Wet Ingredients: Crack the egg into the well, then gradually add the warm water (or milk) and oil/butter (if using). Using a fork, begin to incorporate the flour from the sides into the wet ingredients, slowly bringing the mixture together.
- Knead the Dough: Once the mixture forms a shaggy ball, turn it out onto a lightly floured surface. Knead for 7-10 minutes. The key here is consistency: you want a dough that's smooth, elastic, and no longer sticky. If it's too sticky, add a tiny bit more flour; if too dry, a few drops of water. The dough should spring back slightly when poked.
- Rest and Relax: Form the dough into a ball, lightly grease the bowl, and place the dough back in. Cover it tightly with plastic wrap or a damp cloth and let it rest at room temperature for at least 30 minutes. This crucial step allows the gluten to relax, making the dough much easier to roll out and preventing it from shrinking back. Trust us, patience here pays off!
The Soulful Filling: Preparing Your Savory Cabbage Medley
While the dough rests, it’s time to turn our attention to the star of the show: the incredibly flavorful cabbage filling. This isn't just boiled cabbage; it's a medley of caramelized sweetness and savory depth, creating a filling that's truly irresistible. The reference context highlights the importance of sautéed cabbage, onions, and a hint of garlic, and we'll expand on that to create a filling worthy of an authentic pierogi.
Ingredients for the Cabbage Filling:
- 1 medium head (about 2-2.5 lbs) green cabbage, finely shredded or chopped
- 2 tablespoons butter or vegetable oil
- 1 large onion, finely chopped
- 2-3 cloves garlic, minced
- Salt and freshly ground black pepper to taste
- Optional: 1/2 cup diced ripe tomatoes (fresh or canned, for a touch of sweetness, as mentioned in the reference context)
- Optional: 1/2 teaspoon caraway seeds (for an authentic Polish flavor)
Filling Preparation Steps:
- Sauté Aromatics: In a large skillet or Dutch oven, melt the butter or heat the oil over medium heat. Add the chopped onion and sauté until softened and translucent, about 5-7 minutes. Add the minced garlic and cook for another minute until fragrant, being careful not to burn it.
- Cook the Cabbage: Add the shredded cabbage to the skillet. It will seem like a lot, but it will cook down significantly. Stir well to combine with the onions and garlic. Cover the skillet and let the cabbage steam and soften for about 10-15 minutes, stirring occasionally.
- Caramelize and Season: Uncover the skillet, increase the heat slightly, and continue to cook the cabbage, stirring frequently, until it's tender and begins to caramelize, developing golden-brown edges. This step is vital for depth of flavor.
- Add Optional Ingredients: If using tomatoes, add them now and cook for another 5 minutes until they break down slightly. Stir in the caraway seeds, if desired. Season generously with salt and pepper. Remember, a well-seasoned filling is key to delicious pierogies.
- Cool Completely: Transfer the cabbage filling to a bowl and allow it to cool completely before using. A warm filling can make the dough difficult to work with and cause it to tear.
Assembling and Cooking Your Pierogies to Perfection
With your dough rested and your filling cooled, the true artistry begins: assembling and cooking your pierogies. This is where the magic happens, turning individual components into those beloved, plump dumplings.
Assembly Steps:
- Roll the Dough: Divide the rested dough into two or three manageable portions. On a lightly floured surface, roll out one portion of dough to about 1/16-inch thickness. The dough should be thin enough to be delicate but not so thin that it tears easily.
- Cut Circles: Use a 2.5-3 inch round cookie cutter, drinking glass, or even the rim of a mug to cut out circles from the dough. Gather the scraps, gently knead them together, and re-roll to cut more circles.
- Fill and Seal: Take one dough circle and place about 1 teaspoon of the cooled cabbage filling in the center. Avoid overfilling, as this can make sealing difficult. Moisten the edges of the dough circle with a little water (your finger or a pastry brush works perfectly). Fold the dough over the filling to create a half-moon shape. Press the edges firmly to seal, then crimp with a fork for a decorative finish and extra security. This tight seal is crucial to prevent the filling from escaping during cooking.
- Repeat: Place the finished pierogies on a lightly floured baking sheet or parchment paper, ensuring they don't touch to prevent sticking. Continue until all dough and filling are used.
Cooking Methods:
Traditional pierogi cooking involves a two-step process: boiling for tenderness, then pan-frying for a delightful crispy exterior.
- Boiling: Bring a large pot of salted water to a rolling boil. Carefully drop a few pierogies into the boiling water (don't overcrowd the pot, cook in batches). Once they float to the surface, let them cook for another 2-3 minutes until they are tender.
- Pan-Frying: Using a slotted spoon, remove the boiled pierogies and drain them well. In a large skillet, melt 2 tablespoons of butter or heat 2 tablespoons of oil over medium heat. Add the boiled pierogies in a single layer and pan-fry for 3-5 minutes per side, or until they are golden brown and slightly crispy. This step adds incredible flavor and texture, transforming them from simple boiled dumplings into something truly special.
While this recipe focuses on the traditional boil-and-fry method for optimal texture and flavor, there are indeed quicker, less hands-on approaches, especially for busy weeknights. For those looking for an incredibly simple and efficient way to enjoy Ingredient Sheet Pan Pierogies with Cabbage: Quick Dinner, a sheet pan method can deliver delicious results with minimal cleanup, offering a fantastic alternative.
Serving Suggestions, Variations, and Preserving Your Delights
Once cooked to golden perfection, your homemade pierogies with cabbage are ready to be savored. The beauty of pierogies lies not just in their taste, but in their versatility.
Classic Serving Suggestions:
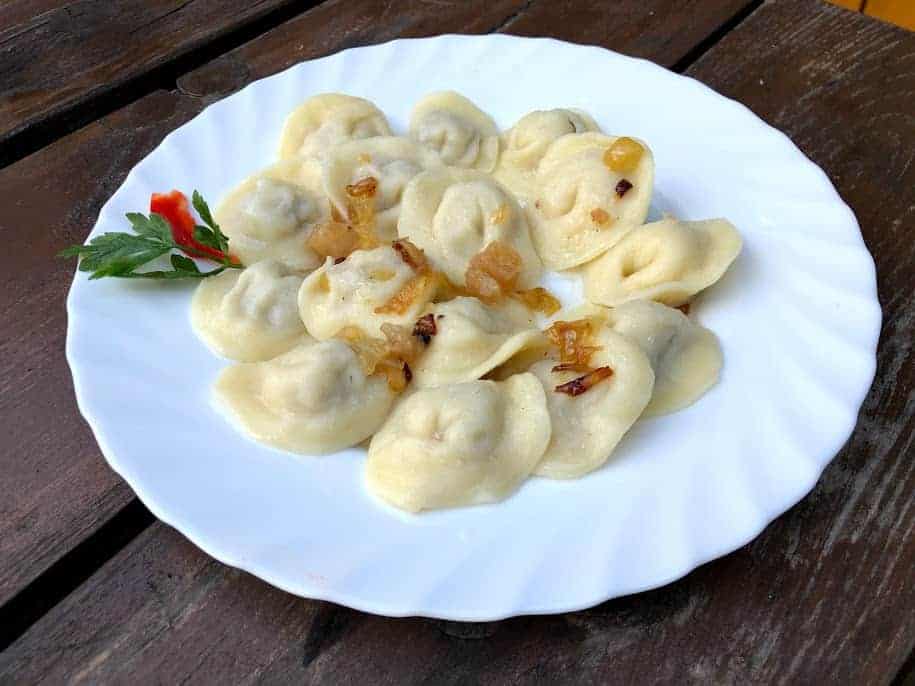
- Crispy Bacon and Sautéed Onions: A timeless pairing! Fry up some bacon until crispy, remove, and then sauté thinly sliced onions in the bacon fat until caramelized. Top your pierogies with this delectable mixture.
- Sour Cream: A dollop of cool, tangy sour cream provides a wonderful contrast to the rich, savory pierogies.
- Fresh Herbs: A sprinkle of fresh dill or parsley adds a touch of brightness and visual appeal.
- Melted Butter: Sometimes, simplicity is best. A generous drizzle of melted butter can enhance the pierogies' inherent deliciousness.
Hearty Variations & Additions:
For those looking to make the meal even more substantial or explore different flavor profiles, consider these ideas:
- Kielbasa: As mentioned in the reference context, swapping bacon for sliced kielbasa and cooking it alongside the onions adds a wonderfully smoky, robust flavor that complements the cabbage beautifully.
- Potato and Cheese: While this recipe focuses on pure cabbage, many traditional pierogi fillings combine cabbage with creamy mashed potatoes and sharp cheese for a richer, more familiar taste. You can experiment by adding some mashed potato and grated cheddar or farmer's cheese to your cooled cabbage filling.
- Sweetness Boost: If your cabbage filling lacks a certain sweetness, beyond optional tomatoes, a touch of brown sugar or apple cider vinegar during the sautéing process can enhance the depth of flavor.
For even more creative ideas and expert advice on enhancing your pierogies, explore our guide on how to Elevate Pierogies & Cabbage: Delicious Additions & Easy Tips.
Preserving Your Pierogies:
Making a large batch is highly recommended! Pierogies freeze beautifully, ensuring you have a taste of Poland ready whenever a craving strikes.
- Freezing Uncooked Pierogies: Arrange newly assembled, uncooked pierogies in a single layer on a floured baking sheet. Freeze until solid (about 1-2 hours). Once frozen, transfer them to a freezer-safe bag or container. They can be cooked directly from frozen; simply boil for a few minutes longer until they float and are tender.
- Freezing Cooked Pierogies: Allow boiled and pan-fried pierogies to cool completely. Arrange them in a single layer on a baking sheet and freeze until solid. Transfer to a freezer-safe bag. Reheat in a skillet with a little butter until warmed through and crispy.
A Culinary Celebration
Pierogies are more than just food; they are a celebration, a link to heritage, and a testament to the joy of homemade cooking. In fact, their popularity is such that October 8th is recognized as National Pierogi Day! This authentic pierogies with cabbage recipe, while requiring a bit of time and effort, offers a deeply rewarding culinary experience. From the first bite of tender dough to the savory, caramelized cabbage filling, you'll taste the tradition, the love, and the incredible satisfaction of a dish made with your own hands. So gather your ingredients, clear your schedule, and embark on this delicious journey. Smacznego!
